
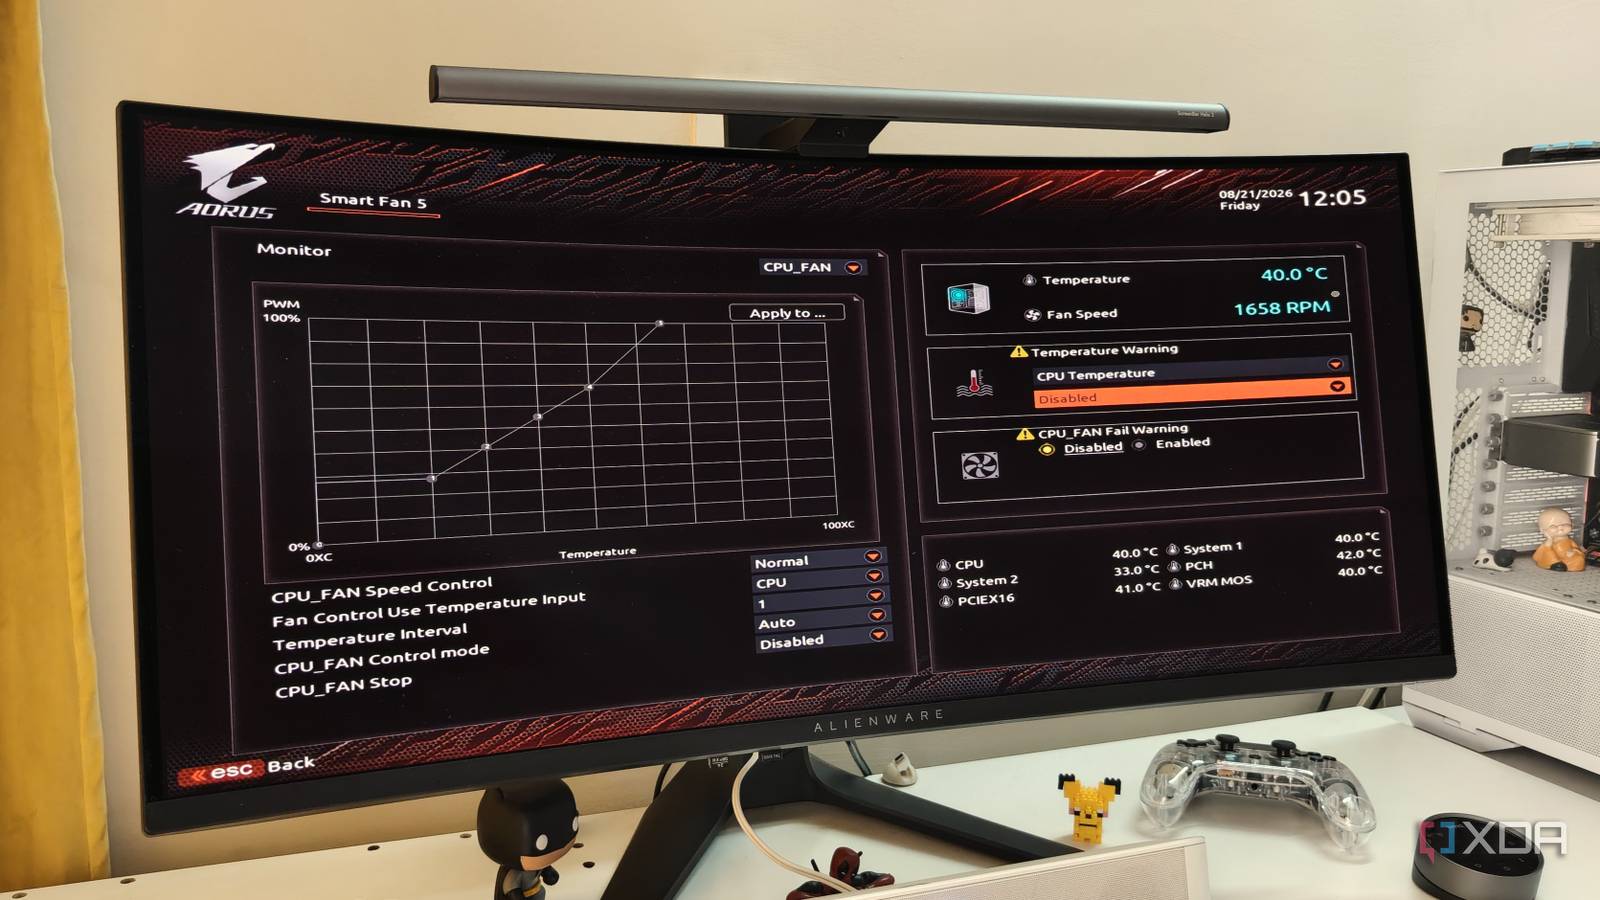
Published Aug 22, 2026, 4:30 PM EDT After a 7-year corporate stint, Tanveer found his love for writing and tech too much to resist. An MBA in Marketing and the owner of a PC building business, he writes on PC hardware, technology, and Windows. When not scouring the web for ideas, he can be found building PCs, watching anime, or playing Smash Karts on his RTX 3080 (sigh). Most gamers these days know that they need to fix several default settings before their PC is ready to rumble. Enabling XMP/EXPO, changing the refresh rate in Windows, and enabling PBO on AMD chips are relatively well-known. However, many users still don't touch the default fan curves in the BIOS, and end up leaving performance on the table. Manufacturers don't pre-tune the fan curves for maximum performance; they pick a safe and silent profile that doesn't alarm the average user. Your default fan curves trade performance for silence, and it's one of the worst bargains on a new PC. Customizing your fan curves in the BIOS or with a third-party utility is a quick, one-time exercise that rewards you every day. The default fan curve is optimized for silence, not performance The defaults are not on your side You'd think your "gaming" motherboard would come with fan curves optimized for a typical gaming session, but that's hardly what happens. The default fan curves on most motherboards are far from ideal, especially on a gaming rig. Even the "Performance" and "Balanced" profiles aren't suited to balancing performance and fan noise. These defaults will keep your PC relatively silent under load, but at the cost of high thermals. Even if your CPU has headroom to boost higher, your default curves can potentially prevent it from sustaining high frequencies. A slightly more aggressive curve will allow you to extract the most out of your hardware. It will be accompanied by greater fan noise, but it's not like your PC will start groaning like a PS4. Besides, if you're wearing headphones most of the time, you'll not even notice the extra RPMs. What you'll definitely notice are the smoother framerates, lower thermals, and a better overall gaming experience. Tuning your fan curve is quick and simple Yet many gamers ignore it for years The best part is that you don't need hours to find the right fan curve for your setup. Unlike overclocking your CPU, tuning your fan curve takes only a few seconds. You just need to head into the BIOS (or UEFI, to be precise) and find the "Smart Fan" or the equivalent section, and dial in a more performant curve that better reflects gaming realities. In a nutshell, the fan speed should remain low at idle temps and ramp up gradually as the load increases. You can dial in around 20–30% fan speed till your CPU is in the 30-40℃ range, and around 70–80% when it pushes past 70℃. Between these ranges, make the curve rise gradually toward the higher temps. You can choose 100% speed for temperatures beyond 80℃ to ensure your CPU doesn't touch throttling temperatures. While you're in the BIOS, you can optimize the system fans, too, so that air intake keeps up with the system load. The system fans are tied to separate sensors, so they don't respond to the CPU temperature. You should ideally tune them more aggressively for when your PC is under heavy load, since the system fan sensors won't report temperatures quite as high as your CPU's. Fan curve utilities offer more control and customization The BIOS isn't the only way Setting custom fan curves in the firmware is usually better, since they take effect the moment your PC boots up. Still, many gamers prefer a utility like Fan Control for its feature-rich tools, which give you far greater control over each of your fans. Unlike the BIOS, Fan Control allows you to map any fan to any temperature sensor. This frees you from the restrictive logic of the BIOS, enabling system fan curves tied to the CPU or GPU temperatures. Additionally, you can map fan curves to multiple sensors for more granular logic. For instance, you could make your case fans ramp up based on the maximum of the CPU and GPU temperatures at any given moment, so that they respond dynamically to the component under greater load. You can also adjust hysteresis settings to avoid constant noise as the fans respond to the respective temperature sensors. Fan Control won't kick in until you completely boot into Windows, but the benefits can easily outweigh that downside. It offers a universal environment where you can tune fan curves for the CPU, GPU, and system fans in one place, and make them talk to each other. Fan Control Don't stick to the defaults for no reason The reason many gamers never bother with the fan curves is that they don't want to mess with what already works. That logic, however, keeps you from pushing your hardware to its potential, something it's designed to do safely. Customizing your fan curves optimizes the cooling behavior of your PC, which directly impacts the performance of your hardware. It should be one of the first things you change on a new machine.
Your motherboard ships with the wrong fan curve, and fixing it takes 30 seconds
Full Article
Original Source
Read the full article at Xda-developers →KhanList aggregates and links to publicly available news content. We do not host full articles from third-party sources. Always verify important information with original sources.