
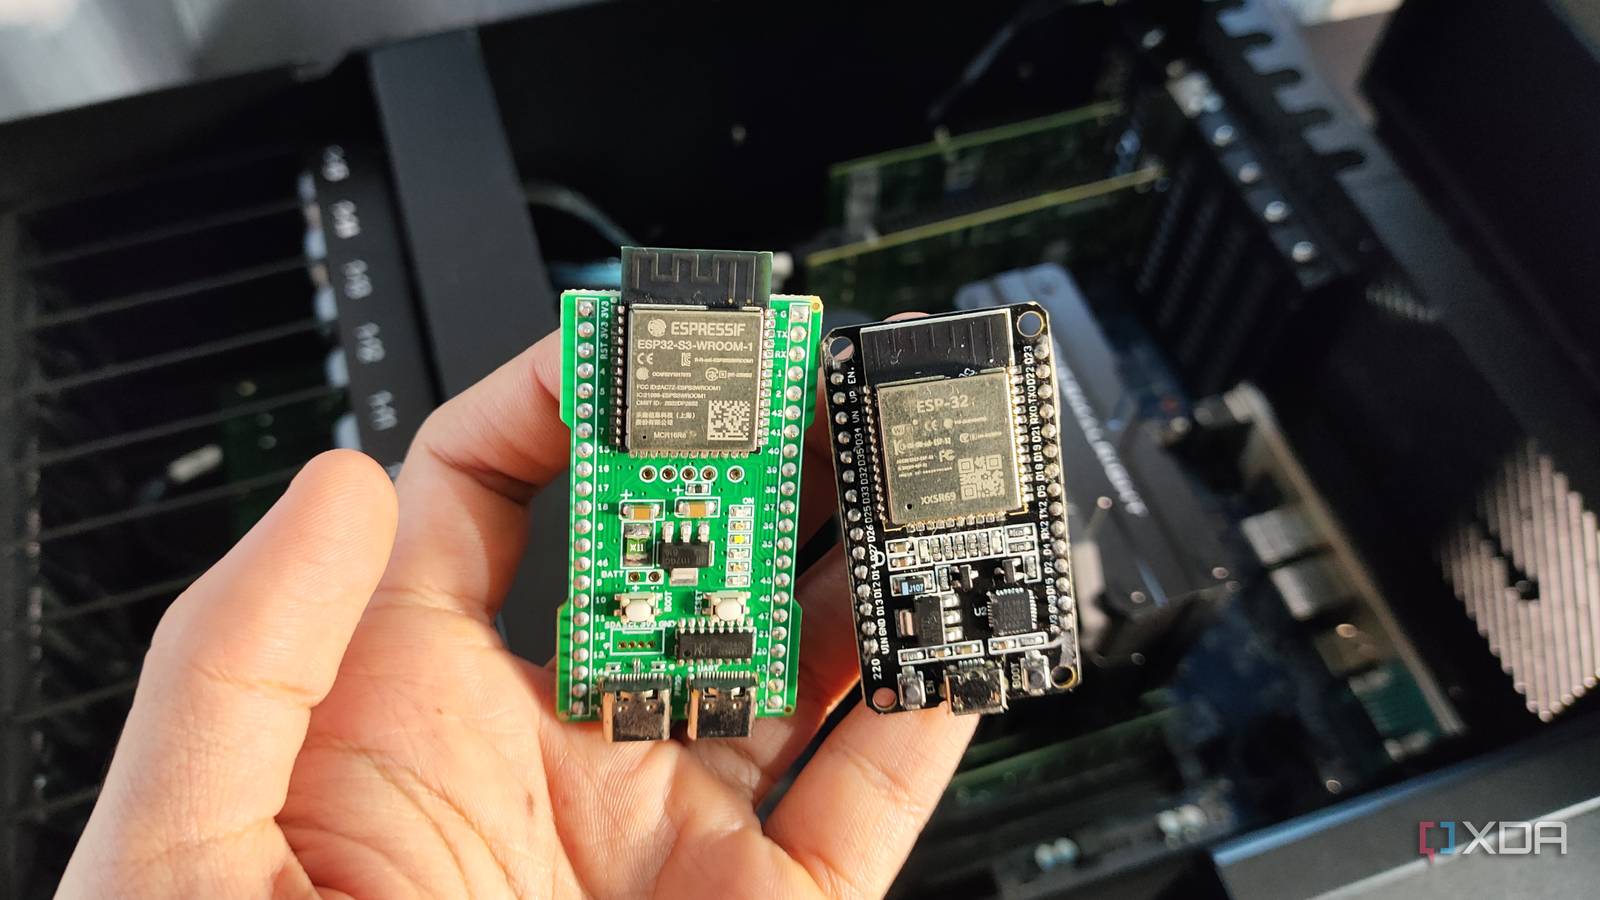
Published Oct 4, 2026, 11:00 AM EDT Ayush Pande is a PC hardware and gaming writer. When he's not working on a new article, you can find him with his head stuck inside a PC or tinkering with a server operating system. Besides computing, his interests include spending hours in long RPGs, yelling at his friends in co-op games, and practicing guitar. The inexpensive price tags on ESP32 boards make them quite enticing to pick up when you’re into building hobbyist projects. In fact, the base ESP32 board is often the most recommended option for newcomers, as it ships with decent specs, is easy to configure, and costs just a few bucks. Personally, that’s the one I used when I was starting out, and I’ve since bought at least a dozen of them for different projects. But as much as I love the ol’ reliable ESP32-WROOM board, I have to admit that there’s another member of the ESP32 family that’s miles better when you’re just starting out: the ESP32-S3. Sure, it’s a tad more expensive than its budget-friendly counterpart, but it's far more versatile and works well with most microcontroller projects you’d want to build early on. The USB-to-Go port on the ESP32-S3 alone makes it worth picking up After all, it lets you build useful PC accessories When you think about beginner-friendly ESP32 projects, you’d typically imagine quick circuit simulations, simple motor-based robotics experiments, or DIY smart devices like weather stations. While you could build most of them with simple ESP32 boards, putting together custom PC accessories that aren’t just dashboards might be a bit of a hassle on anything other than an ESP32-S3. That’s because the ESP32-S3 packs a native USB OTG port, which is extremely helpful when you want to design your own USB I/O devices. Besides the UART port, you’ll find another USB socket on the ESP32, and although this one also lets you flash the microcontroller, its real utility lies in the fact that it can pretend to be a standard USB HID gizmo when you plug it into a PC. Sure, you could technically use it for remote payload execution, but that doesn’t necessarily have to be for malicious purposes. Thanks to the native USB OTG functionality, you can turn the ESP32-S3 into a troubleshooting device – one that executes diagnostic scripts on your PC. Or, you could go down the retro gaming rabbit hole and build custom joysticks by combining the ESP32-S3 with button modules and 3D-printed cases. Likewise, ESP32-S3 boards are just as effective for custom keyboards, mice, or even simple HID storage devices. But my favorite project involving the native USB functionality of the ESP32-S3 is the humble DIY macro pad, which lets you automate certain actions on your PC every time you press a button/key/nub connected to the microcontroller. The best part? Despite being on the beginner-friendly side of things, it’s a neat productivity device that you can still use long after you’ve graduated past the fledgling stage. And once you get more proficient with the microcontroller and additional I/O modules, you can toss a display into the mix and configure the ESP32-S3 to perform the macro actions every time you tap specific parts of the screen. It's also better for demanding projects than its ESP32 counterparts The external PSRAM helps out with RGB screens While we’re already on the topic of screens, the ESP32-S3 has another trick up its sleeve for projects involving displays. Since it packs dedicated hardware for 8-bit to 16-bit parallel RGB, SPI, and QSPI displays, it can drive most colored LCD and AMOLED panels with ease. On the memory front, the ESP32-S3 technically has a lower amount of SRAM at 512 KB compared to the 520 KB you get on the base ESP32, but the 16MB of Flash and 8MB of Octal PSRAM make up for this slight drawback in hardcore projects. Take my experiments involving RGB screens, for example. Since I can allocate double screen-sized frame buffers into the PSRAM on the ESP32-S3, I don't have to worry about heavy screen tears or slow UI transitions. Heck, the ESP32-S3 even supports SIMD vector extension instructions, so you can use it for simple edge AI tasks like keyword spotting, too. Yes, I’m aware that we’re now approaching the intermediate project territory with these examples, and they’re not something most beginners would jump right into. But all the extra features on the ESP32-S3 can help you avoid the typical compatibility and performance issues you’ll encounter if you try using a base ESP32 module for these experiments. And considering that an ESP32-S3 barely costs $10, it’s not as expensive as, say, buying an overpriced Raspberry Pi model just for the extra memory. But if you’re into smart devices, the ESP32-C6 might be the better option Although I adore the ESP32-S3, I have to admit that its C6 sibling serves as the better starting point for hardcore IoT enthusiasts. Unlike the base or S3 models, the C6 not only supports newer Wi-Fi 6 and Bluetooth LE 5.3 standards, but it also has an 802.15.4 radio built into its tiny chassis, which lets you use this board for Thread, Zigbee, and Matter-enabled smart devices. ESP32-S3
Your first ESP32 should be the S3, not the board everyone recommends
Full Article
Original Source
Read the full article at Xda-developers →KhanList aggregates and links to publicly available news content. We do not host full articles from third-party sources. Always verify important information with original sources.