
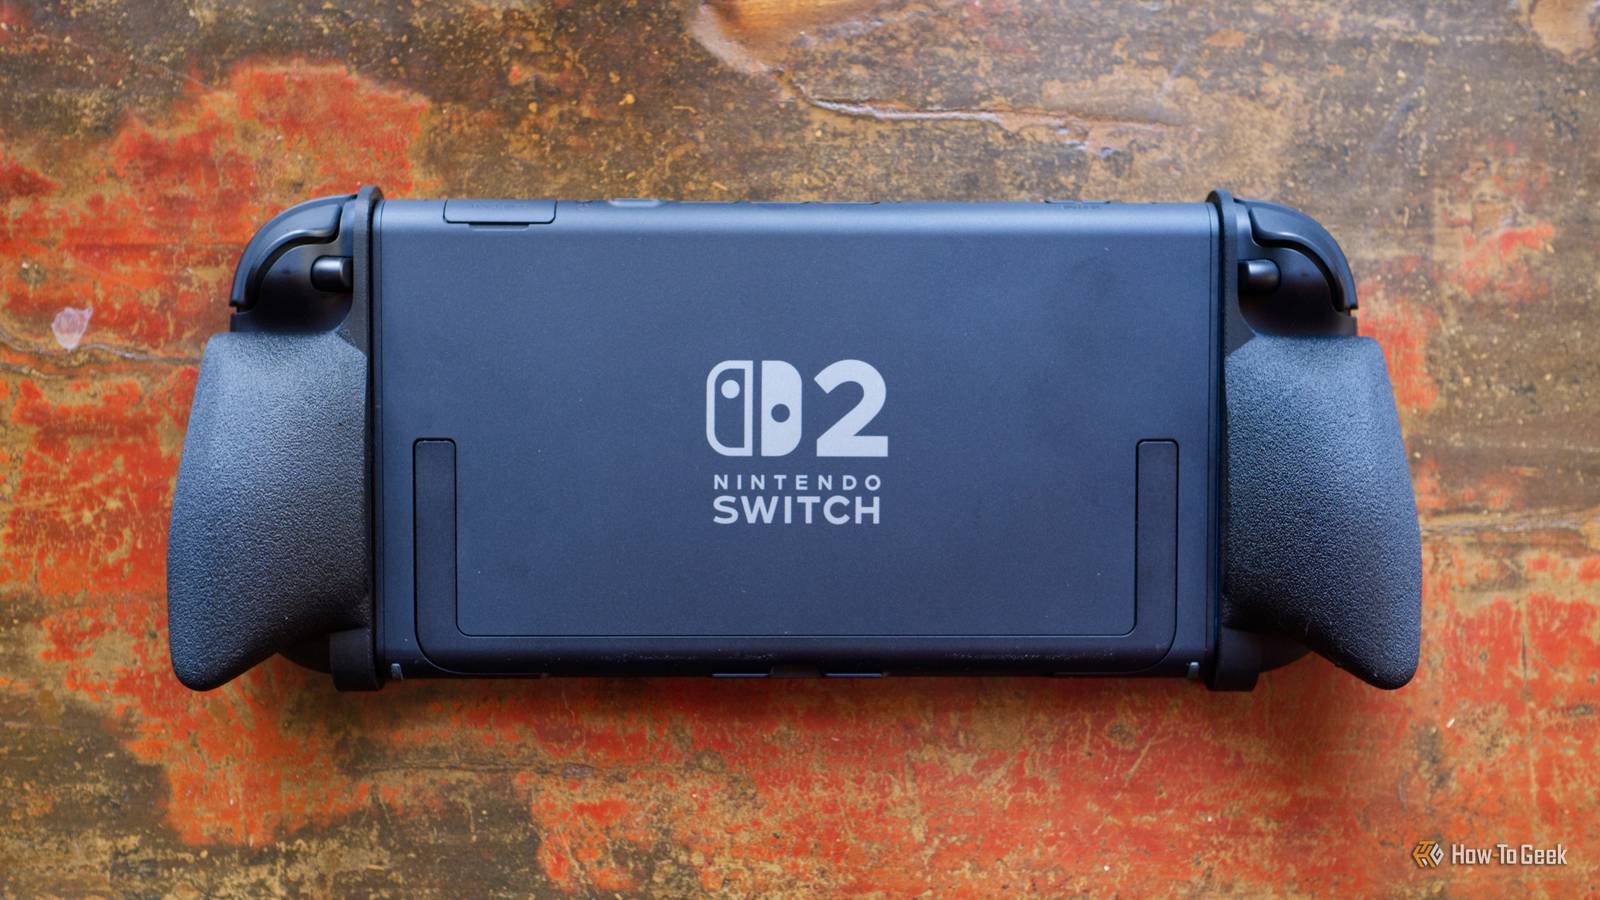
Published Sep 15, 2026, 6:00 AM EDT Tim has been covering technology for almost 20 years, in that time spanning a broad range of topics from security to product reviews. He is especially focused on the Apple ecosystem, productivity, and consumer advice. Over the years Tim has written thousands of articles, reviews, and round-ups in addition to producing video content and original photography. A graduate of journalism, he found his footing as a freelancer with a laptop and loves how he is able to work from practically anywhere. Now a Senior Editor for iPhone, Mac, and Smart Home at How-To Geek, Tim still loves to write. He can also be found crafting round-ups and productivity posts for the Zapier blog. Earlier in his career Tim spent nearly a decade as a writer and eventually Apple section editor for MakeUseOf. Tim currently lives in Brisbane, Australia. Outside of work he loves to hike and work out, play video games, and spend quality time with his wonderful partner and two cats Inka and Roger. I’m surprised it took me so long to realize that I could use my 3D printer to rectify one of my biggest problems with Nintendo’s last two generations of consoles: Joy-Con ergonomics. Despite my slow uptake, within a few hours I had a completely different-feeling console in my hands. The Switch 2’s Joy-Cons are still too small for me Big hands, big problems Credit: Tim Brookes / How-To Geek I bought both the original Switch and the follow-up on launch day, partly out of excitement for a new console launch and partly for work. The revolutionary feel of the original Switch and the fact that you could play an incredible Zelda title anywhere masked a lot of the discomfort I felt when using the Joy-Con. By the time the Switch 2 rolled around, my biggest worry was the console’s ergonomics. I was hoping Nintendo would opt for something closer to Valve’s Steam Deck, but when release day came, I was still left frustrated despite the fact that larger Joy-Cons were certainly a step in the right direction. In the months since, I’ve not spent anywhere near enough time with the Switch 2, despite Nintendo’s growing library of quality exclusive titles. Limited free time and being spoiled for choice when it comes to gaming systems aside, the fact that the Switch 2 just doesn’t feel as good in my hands as the Steam Deck does means it’s second-best, despite the higher-resolution display. Sure, I could play on the TV, but the Switch is a portable platform, and I want it to feel that way: mobile, perfect for short bursts, and markedly different to anything that relies on a static display. The answer, I’ve discovered, is Joy-Con grips. Dedicated Switch grips are pricey with no guarantee of success Printing your own is the way to go I always meant to invest in a pair of third-party Joy-Con grips, but when the console first launched, there were none on the market. Kickstarters and preorders had lengthy lead times, so I told myself I’d come back to it later (and never did). There are some good options around now, with the dbrand Killswitch Case ($60) arguably sitting at the top of the pile alongside the Satisfye ZenGrip 2 (from $50). Cheaper options like the JSAUX ModCase ($30) exist, but all of these cases have one drawback: you can’t test them before you buy them. After being reminded of how uncomfortable undersized handhelds could be, I also remembered the 3D printer I have sitting in the next room. Within a few moments, I’d stumbled across pearigee’s ergonomic Switch 2 Joy-Con grips and had started the roughly four-hour print. My logic was that, at a filament price of $20/kg (the full price of Bambu Lab’s basic PLA when not buying in bulk), the 47g print would come out to about $0.94. That’s less than $1 and only a short four-hour wait to find out if they’re any good. I grabbed a fuzzy skin profile variant from the model’s listing, which uses the fuzzy skin technique to add a bit more grip and hide layer lines. My Switch 2 is “fixed” I did make one mistake, though Credit: Tim Brookes / How-To Geek The result is a night-and-day difference. There’s a reason this model is the most popular example of its kind on MakerWorld, and why so many Switch 2 owners have left positive reviews. They fill my larger hands completely, making it much easier to use the right Joy-Con’s analog stick, squeeze the triggers, and hit the Home button. There’s just enough depth around the back for my fingers to wrap around and grab onto the grip, while both prints feel secure and unlikely to slip. I’m calling it a resounding success, and I’m looking forward to getting more use out of the console in the future as a result. The only thing I’d do differently is dry my filament out before printing next time. In my haste to get the grips finished and on my Switch, I forgot about the filament dry cycle I’d been putting off (the relative humidity percentage inside my AMS 2 Pro should have tipped me off). As a result, there was a fair bit of stringing on the print while it was printing. This has resulted in slightly rough outer edges, where the filament hasn’t quite adhered as neatly as it could have. I’m still happy with the result, but I’m probably going to hit the model with some fine sandpaper to smooth it out. Naturally, you could go even further and pick a unique color combination or funky filament like silk PLA, make it a multicolor print, finish with a clear coat to add a glossy sheen, or add some sort of stick-on grip tape or wrap. I’m happy with a light sand for now, but I am thinking of printing up another set for a friend (and perfecting the print this time). Functional prints are arguably the best prints, especially when they fix annoyances you had learned to live with.
With this $1 3D print, I fixed a problem that Nintendo couldn’t
Full Article
Original Source
Read the full article at Howtogeek →KhanList aggregates and links to publicly available news content. We do not host full articles from third-party sources. Always verify important information with original sources.