
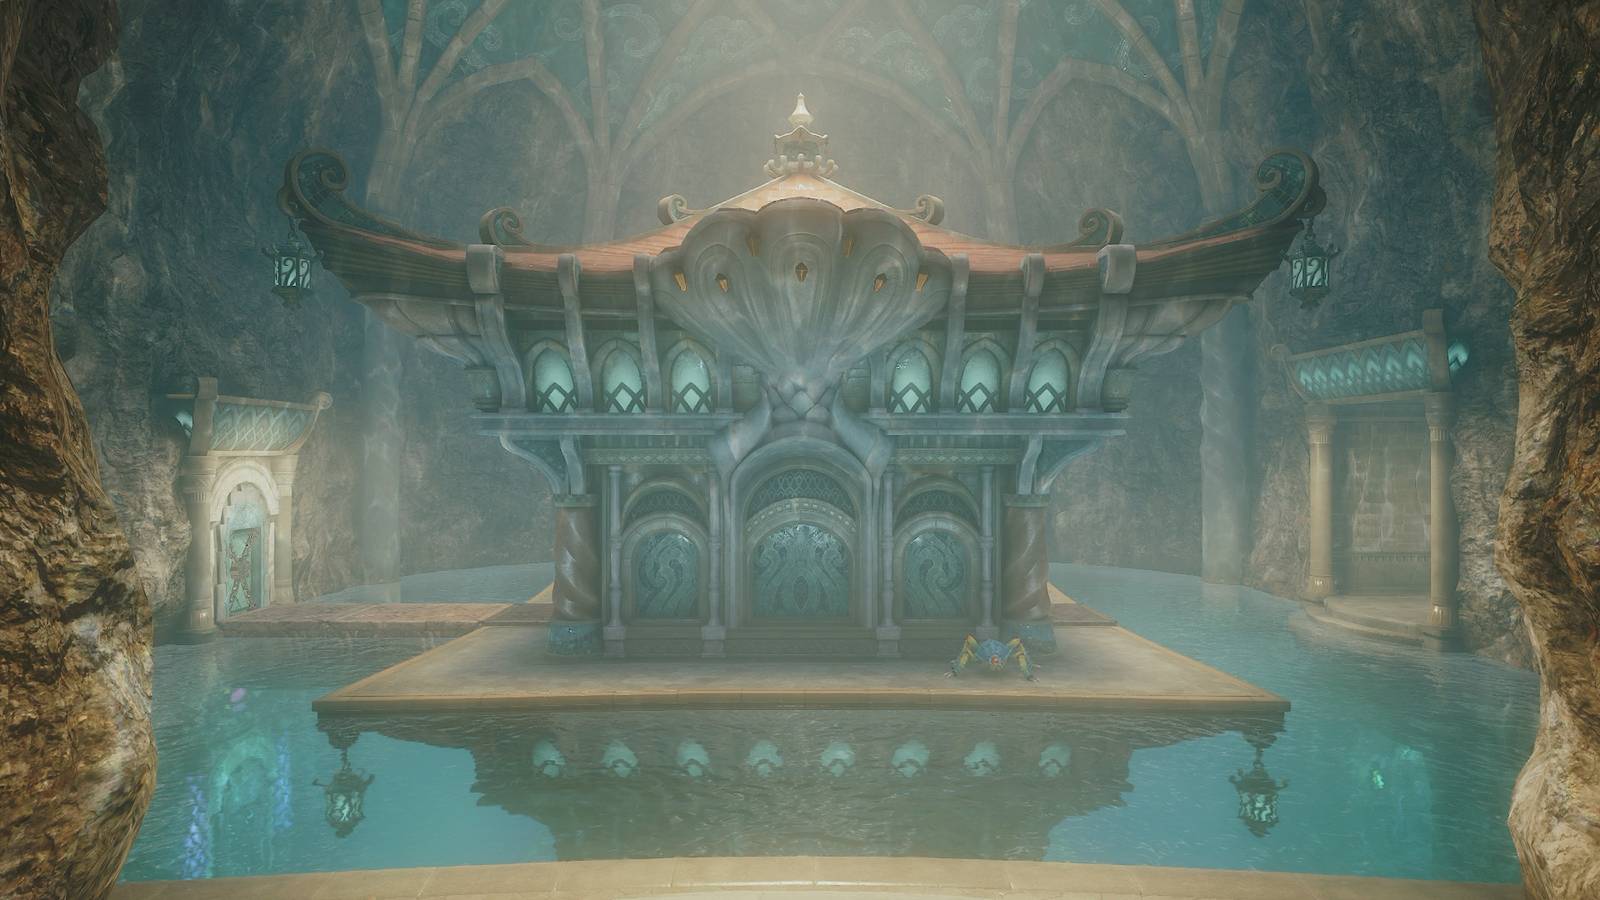
Published Nov 5, 2026, 12:01 AM EST It's sink or swim inside this dungeon Image: Nintendo EPD/Nintendo via Polygon The Water Temple is a dungeon located at the bottom of Lake Hylia in The Legend of Zelda: Ocarina of Time remake, and it's only reachable after Link has traveled into the future. This infamous dungeon is fairly complicated, as you need to constantly adjust the water level inside to unlock more rooms and items. However, as the water level changes, you'll need to constantly adjust your depth to find more rooms. It's a surprise Link doesn't suffer from decompression sickness. To save Link from a headache, here's how to complete the Water Temple in Ocarina of Time remake. Part 1: Getting inside the Water Temple Graphic: Johnny Yu/Polygon | Source images: Nintendo EPD/Nintendo via Polygon To get inside the Water Temple, you'll first need to get the Iron Boots from the Ice Cavern and the Zora Tunic from King Zora. Then, approach the island with the large tree on it from the northeast. You'll find the remaining water in Lake Hylia and an underwater door. Equip the Iron Boots and walk into the water. Look above the door to see a target, and Hookshot it to open the door to the Water Temple. Part 2: Finding the dungeon map Graphic: Johnny Yu/Polygon | Source images: Nintendo EPD/Nintendo via Polygon Walk inside the Water Temple, and take off your Iron Boots to float to the surface. Walk into the main room ahead, and defeat the Blue Tektite on the middle platform. Then, put the Iron Boots back on and descend to the floor. There will be Spikes roaming around, and they're only vulnerable when their spikes are retracted. You can't use your sword underwater, so use your Hookshot to hit them. Go into the doorway on the east side of the room, where you'll find Princess Ruto. After you talk to Ruto, take off the Iron Boots to float to the surface. Open the chest to receive the dungeon map. Then, stand in front of the crest, and play Zelda's Lullaby (Y - X - A - Y - X - A). This will lower the water level in the hole behind you. Part 3: Finding the compass Image: Nintendo EPD/Nintendo via Polygon Drop into the hole and make sure to land in the water. With the water gone, the torch near the entrance is now lit. Stand in the doorway, and look toward the lit torch. Then, aim your Fairy Bow, so that your arrow will go through the fire, and hit one of the unlit torches along the wall. Alternatively, if you unlocked the Great Fairy Fountain at the top of Death Mountain, you can use Din's Fire. Light both torches to unlock the door, and head inside. There will be three Spikes in this room. Roll away from them, and then hit them when their spikes are retracted. After you defeat them, a chest with a small key will appear. Open it and return to the main room. Graphic: Johnny Yu/Polygon | Source images: Nintendo EPD/Nintendo via Polygon Break the rock wall to the south, and use your Iron Boots to sink to the bottom of the water. A Shell Blade will be waiting for you at the end of the hall. Quickly hit the inside of their mouth with your Hookshot to defeat them. If you miss, make sure to roll out of the way and try again. Graphic: Johnny Yu/Polygon | Source images: Nintendo EPD/Nintendo via Polygon Walk to the end of the hall, and take off your Iron Boots to float to the surface. Climb onto the platform, and step on the button on the second tier. A statue with a target will rise from the ground. Hookshot over to it, and defeat the Blue Tektites up ahead. There's also a Like Like on the higher platform. Rather than Hookshotting to the target, Hookshot to the Like Like to stun them. Then, you can unload a ton of attacks on them before they try to suck you up. Avoid their attack and then go in for the final few swings. Then, open the chest to get the compass. Part 4: Getting the Longshot Graphic: Johnny Yu/Polygon | Source images: Nintendo EPD/Nintendo via Polygon Return to the main room, and this time, head to the east. Push the block until it drops into water. Then, put on your Iron Boots and drop in. A Shell Blade will be waiting for you in the water, so be ready to hit the inside of their mouth with your Hookshot. After you defeat them, walk to the north and take off your Iron Boots to float to the top. Graphic: Johnny Yu/Polygon | Source images: Nintendo EPD/Nintendo via Polygon In the next room, there will be a whirlpool. If you look in the water, you'll see a platform about halfway down. Put on your Iron Boots and float to the platform. Then, hit the object in the statue's mouth with your Hookshot. This will open a gate underwater. Take off your Iron Boots, dash through the gate, and quickly dash to the surface. There are two Shell Blades, but you can avoid them if you quickly get out of the water. Open the chest to get a small key. Graphic: Johnny Yu/Polygon | Source images: Nintendo EPD/Nintendo via Polygon Return to the main room, and use a small key to open the door on the pillar in front of you. Once inside, turn around and look up to see a target that you can Hookshot too. You'll find the royal crest, so you know what that means. Play Zelda's Lullaby (Y - X - A - Y - X - A) in front of it, which will raise the water level. Graphic: Johnny Yu/Polygon | Source images: Nintendo EPD/Nintendo via Polygon You can't reach the Hookshot target on the ceiling just yet, so instead, put on the Iron Boots and sink into the hole that the cube was blocking. Down here, you'll encounter three Spikes. Defeat them with your Hookshot, and then Hookshot the object on the wall. A hole in the ceiling will open up, but a Shell Blade will also come with it. Wait for it to open its mouth, and then Hookshot its insides. Graphic: Johnny Yu/Polygon | Source images: Nintendo EPD/Nintendo via Polygon Float into the hole in the ceiling. In this room, you'll find a red rupee and a Gold Skulltula on the west wall. Return to the area with the crest, and go through the door beside the floating cube. This will spit you out in the main room, but now the water level should be at the second floor. Graphic: Johnny Yu/Polygon | Source images: Nintendo EPD/Nintendo via Polygon Head to the east and break the rock wall. In this next area, there are Stingers in the water, so be ready to hit them with your Hookshot! After you defeat them, walk to the end of the path and Hookshot to the target above. In this room, there will be a pillar of water and a diamond-shaped object submerged in a pool next to it. Hit the diamond-shaped object, and the pillar of water will lower. Stand on the platform, and hit the diamond-shaped object again to ride the water up. Jump over to the hallway, and open the chest inside to get a small key. Graphic: Johnny Yu/Polygon | Source images: Nintendo EPD/Nintendo via Polygon Return to the main room, but this time, put on your Iron Boots and sink to the lowest level. Go into the east room again, and float to the top to find a rock wall. Break it, and you'll enter a room with three Shell Blades and a Gold Skulltula. Defeat the enemies, get the Gold Skulltula token, and then head back to the main room. Graphic: Johnny Yu/Polygon | Source images: Nintendo EPD/Nintendo via Polygon Unlock the west door, and hit the diamond-shaped object inside. A Blue Tektite will ride the water down. Defeat it, stand on the platform, and then hit the diamond-shaped object with a ranged weapon like your Hookshot or Fairy Bow. You'll rise to find another royal crest. Play Zelda's Lullaby (Y - X - A - Y - X - A) on the platform, and the water level will rise again. Graphic: Johnny Yu/Polygon | Source images: Nintendo EPD/Nintendo via Polygon Return to the main room, but don't walk off the balcony. Play the Scarecrow Song, which will summon Pierre onto the balcony. Pierre will speed up the process later on, so now you're free to unlock the west door. In this room, you need to quickly Hookshot from platform to platform until you reach the top. Walk to the edge in front of you, and drop onto the platform below. Then, look up and Hookshot to the moving platform in front of you. Then, keep Hookshotting to the higher platforms until you make it to the top. Graphic: Johnny Yu/Polygon | Source images: Nintendo EPD/Nintendo via Polygon Head through the door and hit the diamond-shaped object. Statues with targets around the room will rise, and so will the water level, bringing a few Blue Tektites with it. Defeat the enemies, and then Hookshot over to the statue to your east. Hit the diamond-shaped object to lower the statues, and then Hookshot to the target on the wall to the north. Graphic: Johnny Yu/Polygon | Source images: Nintendo EPD/Nintendo via Polygon Climb over the statue's head, and hit the diamond-shaped object. Then, jump onto the platform on the statue's head, and hit the diamond-shaped object again. After you ride the platform up, go through the door to the north. Graphic: Johnny Yu/Polygon | Source images: Nintendo EPD/Nintendo via Polygon The next room is full of fog. Head straight ahead and go past the tree. Walk up to the door, but it'll lock itself. If you turn around, you'll see a shadowy figure standing beside the tree. If you walk up to it, you'll realize it's actually Dark Link! Image: Nintendo EPD/Nintendo via Polygon There's one important thing to note when fighting Dark Link: don't attack him while his shield is up. He'll jump onto your sword and absolutely mog you. Early on in the fight, he'll just jump off, but later on he'll hit you. It's also just one of the coolest things you'll see in all of Ocarina of Time, so if you do want to see it, do it early on in the fight. Image: Nintendo EPD/Nintendo via Polygon There are two phases to the Dark Link fight. For the first part, he'll slash his sword three times, with the third being the most powerful. Make sure to side jump or flip away a couple of times to avoid the third attack, and then get in a few swings of your own. Repeat this a few times until Dark Link submerges himself in the water. Graphic: Johnny Yu/Polygon | Source images: Nintendo EPD/Nintendo via Polygon When he resurfaces, he'll incorporate two new attacks: a jump attack and a spin attack. For the jump attack, Dark Link will swing twice and then do a side jump. Wait for him to jump, flip away, and then go in for your own attack. Later on in the fight, Dark Link will start to jump attack without any warning, so be ready to dodge as soon as he jumps. For the spin attack, he'll swing twice, stand in place, and then charge up his sword before unleashing the spin attack. Back away, wait for the spin attack to finish, and then go in for an attack. Like the jump attack, Dark Link will just go straight into the spin attack later on in the fight, so get ready to back away. After you defeat Dark Link, the door to the north will open. Head on through and open the chest to get the Longshot. This will upgrade your Hookshot, letting you reach targets twice as far away. Part 5: Getting the boss key Graphic: Johnny Yu/Polygon | Source images: Nintendo EPD/Nintendo via Polygon Longshot to one of the targets above, and drop into the water below. Follow the water current, but avoid the whirlpools. You can either dash away from them or equip your Iron Boots and walk by them if you want to be safe. Graphic: Johnny Yu/Polygon | Source images: Nintendo EPD/Nintendo via Polygon After the first corner, there will be a short turn coming up, but there is a Gold Skulltula on the wall nearby. Equip the Iron Boots after the first corner, and walk to the turn. Look up to the north wall, and you'll see the Gold Skulltula. Longshot it to retrieve its token. Image: Nintendo EPD/Nintendo via Polygon Climb onto the ground just before the final whirlpool, and hit the eye on the wall above the gate. Quickly Longshot to the target before the gate closes, and head through the door to the south. Drop into the water, which will put you in the east room on the lowest floor. Follow the path to return to the main room. Graphic: Johnny Yu/Polygon | Source images: Nintendo EPD/Nintendo via Polygon Put on your Iron Boots and go back to the east room on the lowest floor. Float to the top and use Zelda's Lullaby (Y - X - A - Y - X - A) to lower the water level. Then, go into the central pillar, and Longshot to the second floor. Play Zelda's Lullaby at the crest to raise the water level, and then Longshot to the ceiling to get the Gold Skulltula. Graphic: Johnny Yu/Polygon | Source images: Nintendo EPD/Nintendo via Polygon Exit the door, and go to the floating cube on the north side of the pillar. Longshot the eye on the wall, and then Longshot the target to pull yourself in. Go to the northeast corner and Longshot the target above the waterfall. Graphic: Johnny Yu/Polygon | Source images: Nintendo EPD/Nintendo via Polygon Equip your Iron Boots and follow the path until you find a stone cube on your right. Pull the cube out until you can't pull it anymore, and then Longshot onto the target again. This time, push the cube until you can't anymore. Go into the opening in the wall and float to the surface. Open the chest at the top of the stairs to get a small key. Graphic: Johnny Yu/Polygon | Source images: Nintendo EPD/Nintendo via Polygon Return to the main room, and sink to the lowest level. Go into the northern doorway, and Longshot to the target at the end of the hall. Open the door, and you'll enter a room with a whirpool that is full of Blue Tektites. Get rid of the Blue Tektites with your Fairy Bow, as they'll be pretty annoying if you don't. Graphic: Johnny Yu/Polygon | Source images: Nintendo EPD/Nintendo via Polygon Additionally, there are two holes in the wall: one in the northwest corner and one in the southeast corner. Rolling boulders will fall out of these holes. Wait for the one in the southeast to pass, and then drop into the water. Swim over to the north side of the room, and then put on your Iron Boots. Wait for the northeastern boulder to roll by, walk up to the wall, and float to the top. You should grab the ledge and pull yourself up. Graphic: Johnny Yu/Polygon | Source images: Nintendo EPD/Nintendo via Polygon Go into the next room, which has three rock walls and a pool full of Stingers. There's also a button at the bottom of the pool that will raise the water level as long as it's being pressed. For now, break the middle rock wall, and pull the cube out. Then, break either the left or right rock wall, go behind the cube, and push it into the water. Graphic: Johnny Yu/Polygon | Source images: Nintendo EPD/Nintendo via Polygon After the water level rises, swim over to the doorway and follow the path. Take out the two Blue Tektites with your bow and then step onto the button. Jump across the three platforms and go through the door on the other side. This will bring you to the southeastern corner with the rolling boulders. Wait for a boulder to pass, walk through the waterfall, and jump into the opening on your left. A Shell Blade will be waiting for you, so take them out or just run into the door behind them. Inside the next room, you'll find a chest with the boss key. Graphic: Johnny Yu/Polygon | Source images: Nintendo EPD/Nintendo via Polygon Before you sprint back to the main room, exit the room and look through the waterfall on your right. There will be a Gold Skulltula hiding near the ceiling. Use your Longshot to retrieve its token. Part 6: Defeating the Water Temple boss, Morpha Image: Nintendo EPD/Nintendo via Polygon Return to the main room, and Longshot to the scarecrow in the southwest corner. Then, raise the water level at the crest. Go back to the main room and Longshot to the target in the north. Go through the door, and put on your Iron Boots to fight against the current. Wait for the Blade Traps to go by, and then walk to the top to find the boss room door leading to the Giant Aquatic Amoeba, Morpha. Before you start the fight, it's important to note that Morpha is actually the orb floating around in the water. To damage them, you'll need to pull them out of the water with your Longshot. Additionally, Morpha will go back into the water after every attack. Some of their attacks will sprout multiple tentacles out of the water, but only one of them will be real. Look in the water and watch them as they swim around. Where they end up will be where their real tentacle appears. Graphic: Johnny Yu/Polygon | Source images: Nintendo EPD/Nintendo via Polygon When you're ready to take on Giant Aquatic Amoeba Morpha, hop onto the floating platforms in the middle of the room. For the first part of the fight, Morpha will sprout out of the water, slam the ground three times, and then rest for a bit. Use your Longshot to pull them out of the water while they're resting, and unload as many attacks as you can. Image: Nintendo EPD/Nintendo via Polygon Then, Morpha will come out of the water and do a spin attack. We recommend running around the outskirts of the arena during this part. Once they stop spinning, pull them with your Longshot and attack them. Graphic: Johnny Yu/Polygon | Source images: Nintendo EPD/Nintendo via Polygon Morpha will go back into the water, and a bunch of water tentacles will appear. Only one of them will contain Morpha's body. Find the correct tentacle and move over to it, but if you get near a tentacle, it will slam onto the ground. This is a great time to Longshot to the targets on the wall to get to Morpha as quickly as possible. Approach the real tentacle, and wait for it to slam the ground. Pull them out, and hit them as many times as you can. Graphic: Johnny Yu/Polygon | Source images: Nintendo EPD/Nintendo via Polygon For the next attack, three tentacles will come out of the water, and you guessed it, only one will contain Morpha's real body. However, this time, you won't have to chase it down, as it'll do the spin attack again and come for you. Like always, pull them out with Longshot and attack them. If you've been spam attacking Morpha, there's a good chance that the fight will end here. Image: Nintendo EPD/Nintendo via Polygon If the fight didn't end, Morpha has one more attack up its sleeve. A wall of tentacles will come out of the water, and they'll all slam the ground at once. Look for Morpha's body, and attack it until you defeat them. After you defeat them, collect the Heart Container and exit the dungeon through the ring of light.
Water Temple dungeon walkthrough in Ocarina of Time
Full Article
Original Source
Read the full article at Polygon →KhanList aggregates and links to publicly available news content. We do not host full articles from third-party sources. Always verify important information with original sources.