
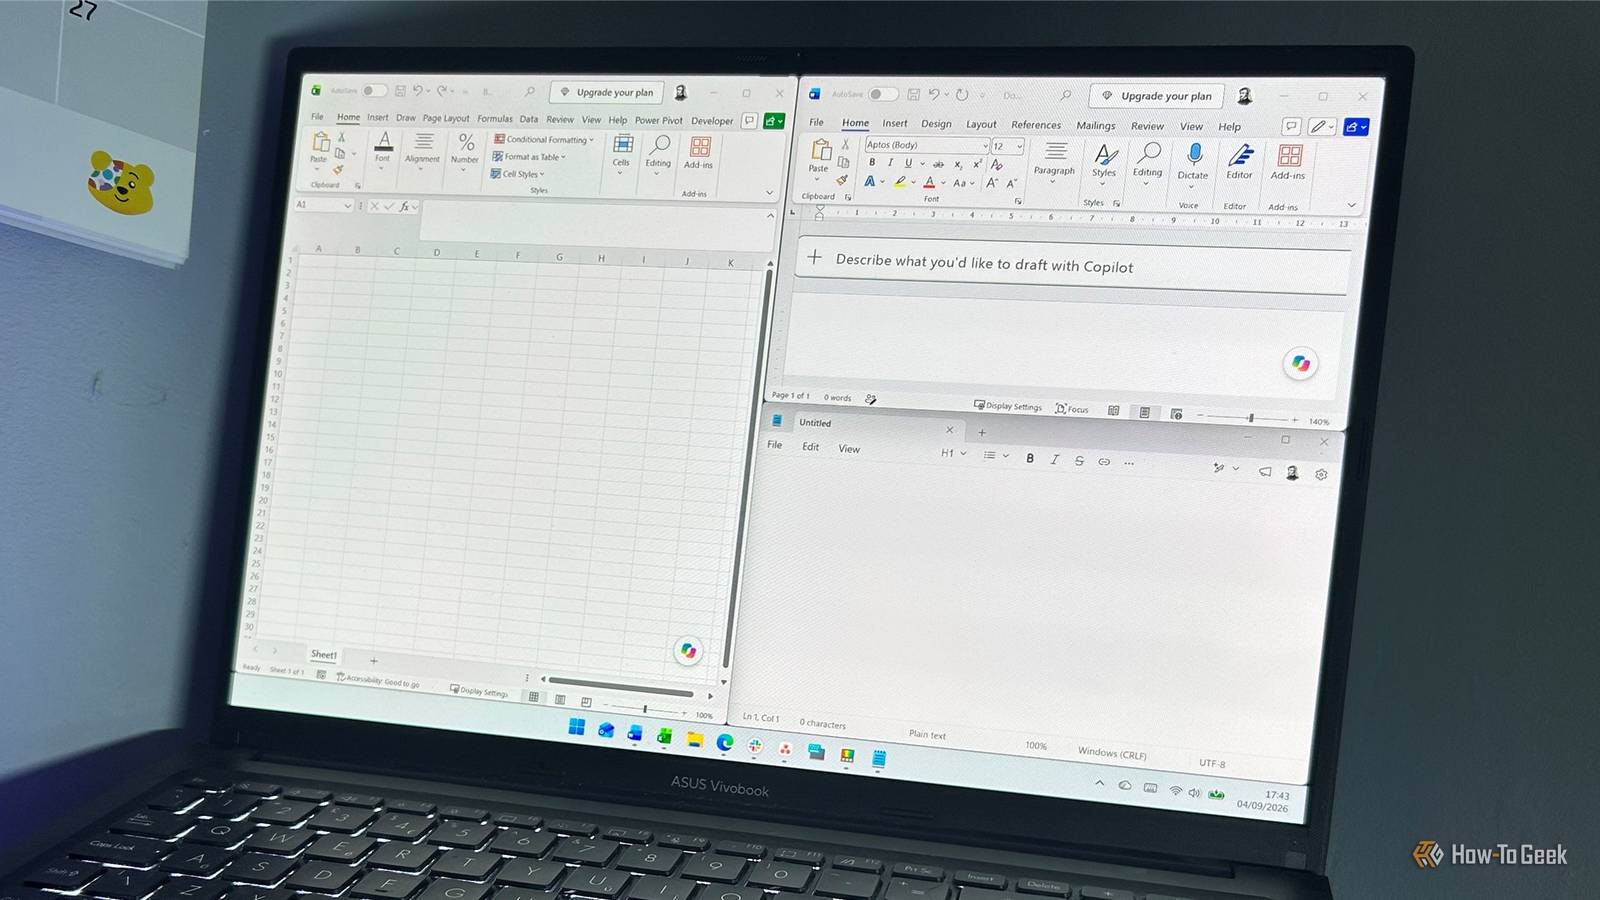
Published Sep 4, 2026, 8:00 PM EDT Tony Phillips is an experienced Microsoft Office user with a dual-honors degree in Linguistics and Hispanic Studies. Prior to starting with How-to Geek in January 2024, he worked as a document producer, data manager, and content creator for over ten years, and loves making spreadsheets and documents in his spare time. Tony is also an academic proofreader, experienced in reading, editing, and formatting over 3 million words of personal statements, resumes, reference letters, research proposals, and dissertations. Before joining How-To Geek, Tony formatted and wrote documents for legal firms, including contracts, Wills, and Powers of Attorney. Tony is obsessed with Microsoft Office! He will find any reason to create a spreadsheet, exploring ways to add complex formulas and discover new ways to make data tick. He also takes pride in producing Word documents that look the part. He has worked as a data manager in a secondary school in the UK and has years of experience in the classroom with Microsoft PowerPoint. He loves to encounter problems in Microsoft Office and use his expertise and legal-level training to find solutions. Outside of the Microsoft world, Tony is a keen dog owner and lover, football fan, astrophotographer, gardener, and golfer. Every morning, I open the same apps and then spend the next few minutes dragging, resizing, and rearranging them across my two monitors. By the afternoon, everything has shifted again. I was getting tired of rebuilding the same desktop layouts, so I went looking for a better way. Then I found an easy-to-use PowerToys tool: Workspaces. Getting started with PowerToys Workspaces It's not as complicated as it sounds If you've never used PowerToys before, don't worry. Getting Workspaces up and running takes less than a minute. First, install PowerToys from the Microsoft Store, then: In your system tray, right-click the PowerToys icon. Click Settings. Scroll to Workspaces. Make sure the toggle is on. The PowerToys interface can vary slightly between versions, so you may see Workspaces in a different location. Now that Workspaces is enabled, you're ready to find the Editor. In my setup, Workspaces appears in the Quick access area. When I click it, I'm taken straight there. If you don't see it there, click Windowing & Layouts > Workspaces, then select Open editor. This is where you'll create and manage your saved app layouts. From here, you can arrange your apps and save the setup for later. PowerToys Workspaces remembers where my apps belong I created separate setups for weekdays and weekends Workspaces lets me save a collection of apps along with the positions of their windows. When I launch that workspace later, PowerToys opens those apps and restores their saved positions. I use my PC differently depending on what I'm doing, so I've created separate Workspaces for my weekday and weekend routines. My Weekday workspace is built around the apps I use for work. I have Word, Excel, and Notepad on my left monitor, with Slack, Asana, and Edge on my right monitor. That's the arrangement I want to see when I sit down to work, so I've saved it as a workspace rather than rebuilding it every morning. My Weekend setup is completely different. I can have Edge open to my golf tracking website on one screen, with Xbox and a weather app on the other. When I want to switch from work mode to my weekend setup, I can launch the corresponding workspace instead of opening each app and arranging everything manually. Yes, there are other ways to achieve something similar. I could use AutoHotkey to create a script that opens certain apps, or build my own Windows shortcuts and scripts to automate parts of the process. The difference is that those methods make me tell Windows what to do. With Workspaces, I can simply arrange my desktop the way I want it and tell PowerToys to remember it. No scripts needed. Don't confuse Workspaces with FancyZones. FancyZones gives you reusable zones for positioning windows, while Workspaces remembers which apps belong in those positions. You don't need FancyZones to use Workspaces, either. Creating a workspace takes only a minute Arrange everything once and save it Creating a workspace is straightforward. Once you've opened the Workspaces Editor, click Create Workspace, open the apps you want, and arrange their windows as you like. You don't need two or more monitors to make the most of this feature; it works just as well with a single screen. Once everything looks right, close anything you don't want included, click Capture, then give the workspace a name. Before you save the workspace, there are two more options worth considering: Create desktop shortcut: Adds a shortcut to your desktop that you can double-click whenever you want to launch that workspace. This is the quickest way to get back to a saved setup without opening PowerToys. Move existing windows: Moves apps that are already open into their saved positions when you launch the workspace. This is useful if you already have some of the apps running and don't want Workspaces to open another set of windows. Don't worry if you make a mistake when capturing your workspace. After clicking Capture, you can click Remove next to any app you don't want to include. You can also open an app's drop-down menu to change its saved window position to Maximized, Minimized, or Custom. Custom lets you adjust the left, top, width, and height while the preview updates to show the result. The same menu also includes a Launch as Admin option, which can help if an app needs administrator privileges to launch or be repositioned correctly. Workspaces can launch apps with specific content, too. You can add an app's CLI arguments from its drop-down menu in the Workspace Editor—for example, you could have Excel open a particular workbook or your browser open a specific website. The available arguments vary by app. Some apps may still behave differently from others, so you might need to experiment with their available options to get the behavior you want. I can mess up my layout and restore it My saved workspace becomes a reset button This is probably my favorite part of Workspaces. Once I've launched a workspace, I'm free to mess with it. I can move Excel somewhere else, resize Word, minimize Edge, or close an app altogether, and those changes don't alter the saved workspace. Because I have Move existing windows enabled, I can launch the workspace again, and PowerToys restores my open windows to the positions I originally captured. That effectively gives me a reset button for my desktop. I can change my layout during the day without worrying that I've lost the arrangement I actually want. If I later decide to keep a new arrangement, I can edit the workspace, make my changes, capture the new layout, and save it again. There are just two things to bear in mind once you get going. Workspaces adds a new arrangement to what's already open rather than replacing it. It also remembers the screens connected to your PC, so your layout may change if you regularly connect or disconnect a monitor. I no longer have to rebuild the same desktop For me, the appeal of PowerToys Workspaces is simple: I decide where each app belongs, save the arrangement, and come back to it whenever I need it. And that's part of what I like about PowerToys in general: Workspaces is just one of the many useful additions tucked inside the suite. For example, it lets you extract text from images, pick colors from anywhere on your screen, and batch-rename files. So if you haven't explored the suite before, now's as good a time as ever to get started.
I finally found an easy way to make Windows remember exactly where every app window belongs
Full Article
Original Source
Read the full article at Howtogeek →KhanList aggregates and links to publicly available news content. We do not host full articles from third-party sources. Always verify important information with original sources.