
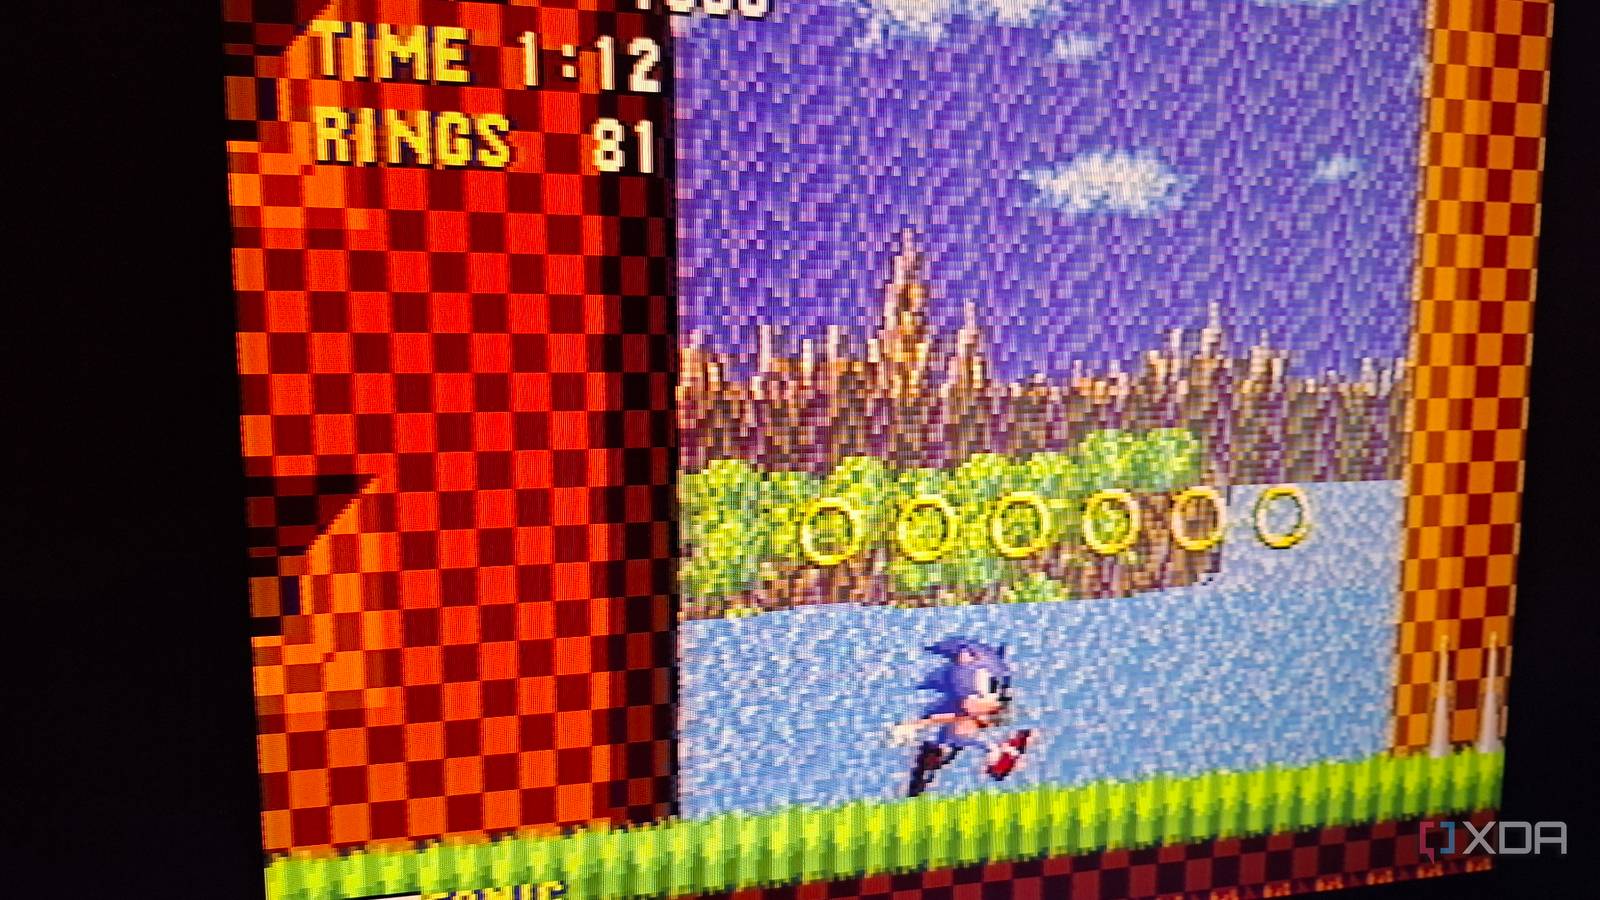
Published Sep 20, 2026, 11:30 AM EDT Simon is a Computer Science BSc graduate who has been writing about technology since 2014, and using Windows machines since 3.1. After working for an indie game studio and acting as the family's go-to technician for all computer issues, he found his passion for writing and decided to use his skill set to write about all things tech. Since beginning his writing career, he has written for many different publications such as WorldStart, Listverse, and MakeTechEasier. However, after finding his home at MakeUseOf in February 2019, he would eventually move on to its sister site, XDA, to bring the latest and greatest in Windows, Linux, and DIY electronics. Have you ever booted up a childhood game and wondered why it looks far worse than you remember? Most of the time, it's rose-tinted glasses, but if you remember games from the CRT era, nostalgia may not be the only factor. Old games were built to display on CRT, and when they're brought onto modern displays, things look...weird. Fortunately, getting your old games looking 'as they should' is far easier than shelling out for an old TV. In fact, all you need to do is click a few buttons in RetroArch, and you get a strikingly accurate reproduction of how the game was 'meant' to look. Using RetroArch as-is can give you some subpar visuals Cool graphical effects end up looking weird For this experiment, I'm going to load one of my own childhood classics into RetroArch and see how it looks with zero settings enabled. Take a look at Sonic running past a waterfall in the video above. It's from the very first Sonic the Hedgehog, and midway through the first level, there's meant to be a really stunning transparency effect where you can see Green Hill Zone's background scene behind the water. Except, if we just load Sonic the Hedgehog into RetroArch and run it as-is, the 'stunning transparent effect' looks...awful. The background has this nasty flicker to it that hurts to look at. That's what you're seeing in the video above: the game running with zero filters. It's clean, but it's too clean; the sprites look crisper, but everything looks worse overall. The reason for this is that Sonic the Hedgehog was meant to run on a CRT screen. These didn't use pixel grids; they used an electron beam that scanned across the screen. Because of this, the colors blended into one another, and game developers not only worked with it, but they took advantage of the tech to pull off some cool effects. So, why does Sonic's waterfall look horrible? Well, they were designed to take advantage of the CRT signal's limited horizontal bandwidth that smears adjacent pixels together. On a CRT, the grid-like design of the waterfall was meant to meld with the background to create a cool visual effect. On an LCD screen where everything is sharp, the illusion crumbles, and you just see a nasty grid-like waterfall that flickers as you play. Fixing this problem requires very little effort No need to get all technical The good news is that you can easily fix this with a shader. The really good news is that someone has likely already done all the hard work for you. All you need to do is download and enable the shader, and you can game like it's the '90s again. To get started, I opened RetroArch, Main Menu > Load Core > Download a Core, and grabbed the Sega - MS/GG/MD/CD (Genesis Plus GX) core. This lets me play the game, but if we just ran Sonic the Hedgehog right now, the waterfalls would look ugly, like in the video above. For the authentic look, I went to Settings > Video > Scaling and set it to 4:3. I also turned Integer Scale to On to ensure the pixels scale evenly. Back in the main menu, I went to Settings > Drivers and set Video from gl to Vulkan. I then restarted RetroArch, went to Main Menu > Online Updater, scrolled down, and clicked Update Slang Shaders. Once that was done, I booted up Sonic the Hedgehog, pressed F1 to bring up the Quick Menu. I scrolled down and clicked on Shaders, then turned Video Shaders to On. I then clicked Load Preset, and navigated to the shaders_slang > ntsc folder. I then opened the shader called ntsc-320px-composite.slangp. I then pressed F1 again to close the menu and play Sonic the Hedgehog. Immediately, the game looked like how I remembered it on TV. Sonic the Hedgehog now looks as it's meant to No more weird-looking waterfalls With the shader enabled, I played the game once again. You can see the results above. Look how good the waterfall looks now! That's how it was always meant to look, taking advantage of how electron beams worked to mix the colors. The result is a really stunning effect for its time, especially from the very first Sonic title. And this is just scratching the surface. If you take a look at the presets folder, you'll notice a shader for pretty much every situation you can think of. Feel free to explore the folders and find the one for your old setup; there's a good chance someone had already made a preset for it. It's really easy to make your old games look authentic With RetroArch, giving your game the retro look they deserve is incredibly simple. Now you can play the classics as they were meant to look instead of the ugly, jagged visuals that LCDs give us.
Emulators made my childhood games look worse until I enabled one simple shader
Full Article
Original Source
Read the full article at Xda-developers →KhanList aggregates and links to publicly available news content. We do not host full articles from third-party sources. Always verify important information with original sources.